Configure BuddyPress for Multisite
After activating BuddyPress, you will be automatically redirected to the BuddyPress Welcome Screen if this is the first time you’ve activated BuddyPress or if you’ve just upgraded BuddyPress. After taking some time to check out the new features added to the plugin, go to Network Admin menu > Settings > Components to begin configuring your installation.
- Network Admin > Settings > Components panel
- Network Admin > Settings > Pages panel
- Network Admin > Settings > Options panel
Network Admin > Settings > Components
By default, BuddyPress Core and the Members components are enabled (Must-Use). Extended Profiles, Account Settings, Activity Streams, Notifications, and Site Tracking components are activated for you.
You can however, selectively disable/enable any of the components later if you so choose by using the same form. Your BuddyPress installation will continue to function. However, the features of the disabled components will no longer be accessible to anyone using the site.
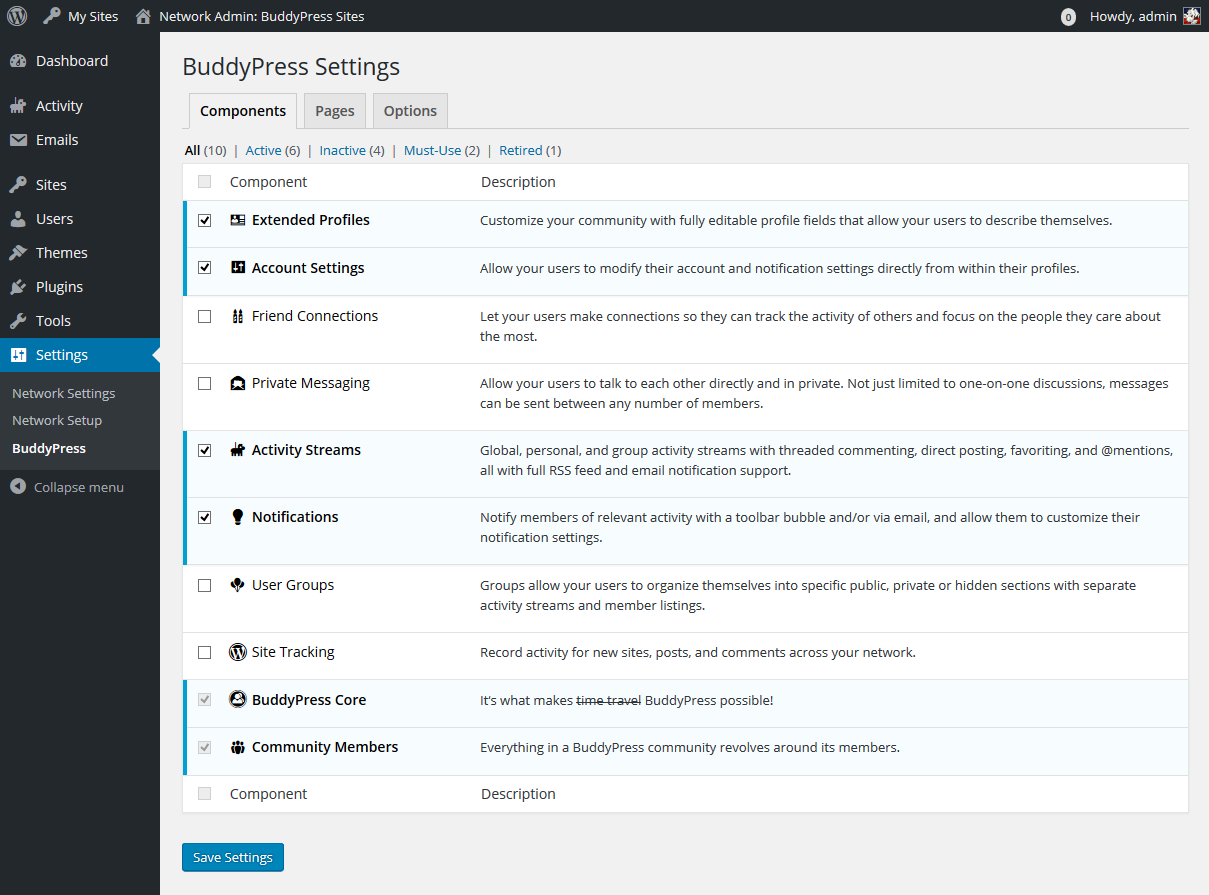
Available Components
Each component has a unique purpose, and your community may not need each one.
- Extended Profiles
Customize your community with fully editable profile fields that allow your users to describe themselves. - Account Settings
Allow your users to modify their account and notification settings directly from within their profiles. - Friend Connections
Let your users make connections so they can track the activity of others and focus on the people they care about the most. - Private Messaging
Allow your users to talk to each other directly and in private. Not just limited to one-on-one discussions, messages can be sent between any number of members. - Activity Streams
Global, personal, and group activity streams with threaded commenting, direct posting, favoriting and @mentions, all with full RSS feed and email notification support. - User Groups
Groups allow your users to organize themselves into specific public, private or hidden sections with separate activity streams and member listings. - Site Tracking
Record activity for new posts and comments from a single site in your network or from all sites in your network depending on how you configured BuddyPress for your multisite installation. (“Multisite/Network” is a feature of WordPress which needs to be manually enabled and configured first. Instructions for enabling this can be found at the WordPress codex WP Codex – Create A Network)
Required Components
The following components are required by BuddyPress and cannot be turned off.
- BuddyPress Core: It‘s what makes [time travel] BuddyPress possible!
- Community Members: Everything in a BuddyPress community revolves around its members.
Network Admin > Settings > Pages
BuddyPress components are rendered as WordPress Pages. Make sure that activated components have corresponding pages assigned to each in this panel.
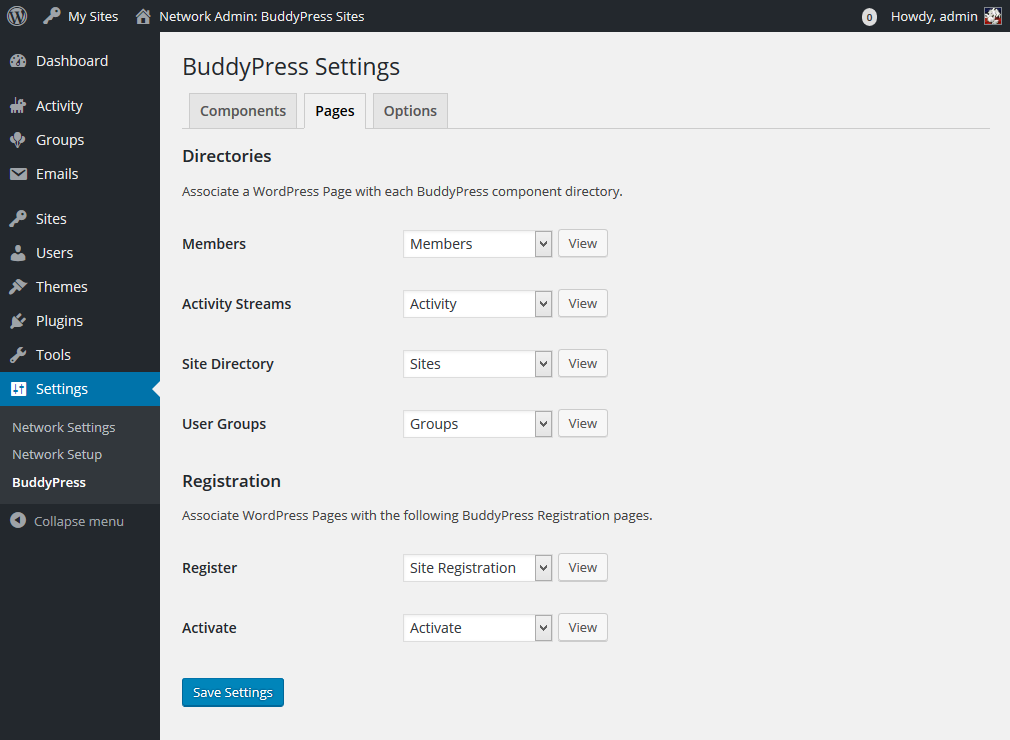
Directories
Associate a WordPress Page with each BuddyPress component directory.
- Activity Streams
- User Groups (if activated)
- Members
- Site Tracking (Blogs for Multisite)
Registration
Associate WordPress Pages with the following BuddyPress Registration pages if you want to enable registration.
- Register
- Activate
Network Admin > Settings > Options

Main Settings
- Toolbar: Show the Toolbar for logged out users (default: enabled)
- Account Deletion: Allow registered members to delete their own accounts (default: enabled)
Profile Settings
- Profile Photo Uploads: Allow registered members to upload avatars (default: enabled)
- Cover Image Uploads: Allow registered members to upload cover images (default: enabled)
- Profile Syncing: Enable BuddyPress to WordPress profile syncing (default: enabled)
Groups Settings
- Group Creation: Enable group creation for all users (default: enabled)
Administrators can always create groups, regardless of this setting. - Group Photo Uploads: Allow customizable avatars for groups (default: enabled)
- Group Cover Image Uploads: Allow customizable cover images for groups (default: enabled)
Activity Settings
- Blog & Forum Comments: Allow activity stream commenting on blog and forum posts (default: disabled)
- Activity Auto Refresh: Automatically check for new items by viewing the activity stream (default: enabled)